Need to remove the rear bench to wire in a subwoofer? (Psst! Check out my Vibe Subwoofer install here).
This how to guide shows you the step by step instructions for removing and refitting the seats in your Rover 25 or MG ZR.

This post may contain affiliate links. Please read my disclosure for more info.
Time to Complete - 45-60 minutes
Difficulty - 3/5
Tools and Parts Required
- Torx T50 bit
- Ratchet
- 10mm socket
- 13mm socket
- Torque wrench
Disclaimer: Any information given in this guide is to be used at the readers own risk. I take no responsibility for injuries to the reader or damage to their vehicles. If this guide is followed correctly, no harm should occur to either the reader or the car.
Please read through the entirety of this guide prior to undertaking any work, and take due care.
How to Remove and Refit MG ZR / Rover 25 Seats
Step 1 - Disconnect the Battery
It's really important to do this prior to removing the front seats, latent charge could cause the seat belt pre-tensioners to fire.To disconnect the battery, follow my battery disconnecting guide up to, and completing, step 2.
Allow at least 10 minutes for the circuits to discharge before continuing with this guide.
How to Remove Rover 25 and MG ZR Front Seats
Step 2 - Remove 4x Seat Frame Bolts
Using the Torx T50 bit in the ratchet remove the four bolts holding each corner of the seat rails down. I recommend sliding the seat fully back for better access to the front two bolts, and then fully forward for better access to the rear bolts.All four bolt locations are shown below (for the passenger side seat, mirrored for drivers side).

Front Right and Left (respectively)


Rear Right and Left (respectively)


Step 3 - Disconnect Pre-tensioner Cable
Tilt the whole seat back and rest it on the rear seats, do not move it too far though. Making absolutely sure the battery has been disconnected, locate the seat belt pre-tensioner cable connection and disconnect it. It should be clipped to the bottom of the seat.

Step 4 - Remove Front Seat
The front seats can now safely be removed from the car. With the front seats out, your car will look like this.
How to Remove Rover 25 and MG ZR Rear Seats
Remove the rear bench before removing the seat backs.
Step 5 - Remove 3x Rear Bench Bolts
Using the 10mm socket and ratchet, locate and remove the 3 bolts holding the rear bench in place. Two are located at either corner, and one is located in the middle. To access them pull down the bench foam in the gap between the bench and the back. If the seats are in good condition it'll take a fair bit of force to reveal the bolts.


Step 6 - Remove Rear Bench
Once these 3 bolts have been removed the bench should pivot forward and come away fairly easily.Step 7 - Loosen Rear Seat Back Bracket
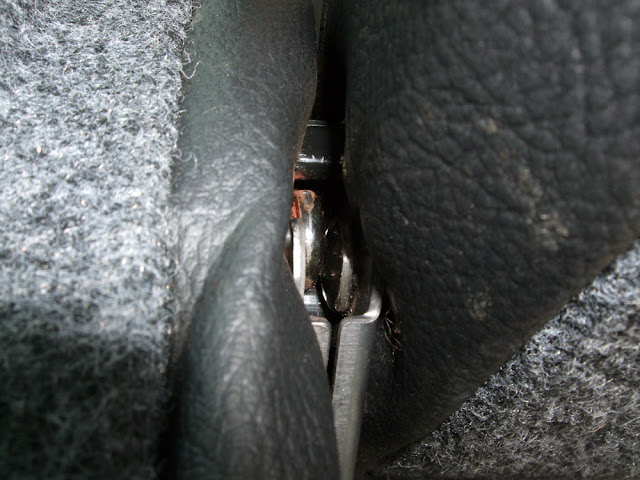
Reposition yourself into the boot, and locate the upright bracket in between the back seats. Using the 13mm socket undo this bolt. Undoing this bolt will release the catch holding the seat into it. When suitably loosened the seats will simply lift out. See the images below for removing the larger back seat.


Step 8 - Remove Rear Seat Backs
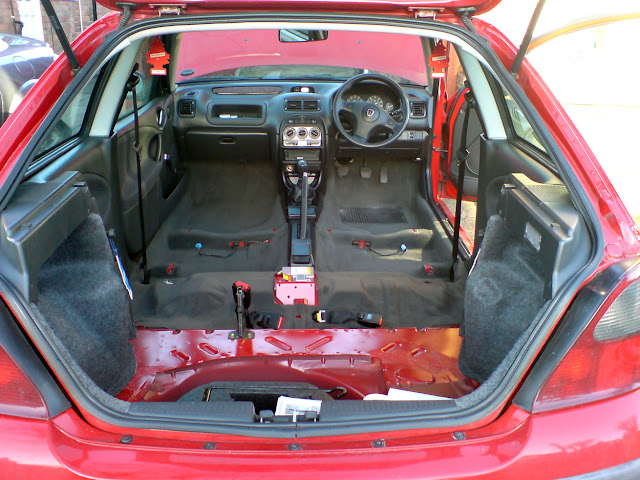
After removing both of the rear seat halves, the interior of your car should look something like this.
Step 9 - Refit Seats
Refitting the seats is a case of following steps 1 - 7 in reverse. However please note the following Torque setting;Rear bench to the floor bolts: 10Nm / 7ft lb
Job Done!
Only thing left to do is grab your keys and go for a drive!Let me know in the comments below which seats you've fitted and why, and be sure to check out my other service and how to guides to keep your MG Rover running and looking sweet!

8 Comments
well explained and pictured
ReplyDeleteFinally some good explanation! Nice one, you solved my day question!
ReplyDeleteAwesome post, perfect help! cheers dude
ReplyDeleteI got some leather seats from a rover 25 and put them in my mgzr, only problem is that the wire connectors are different, is this easy to change, they are currently not connected so the srs light is on
ReplyDeleteHi there,
DeleteI remember this being an issue when I bought my MG ZR seats. I believe the connector changed when the facelift (mid life refresh) models came out. The older ones were blue and newer ones were a different colour.
I - believe - you can just splice your old seat connector onto the new seats and this will work ok, but if I were you I would look further into it as messing with the SRS could effect your car's safety.
Apologies I can't give you a definitive answer on this one. Hope you get it sorted.
Best regards,
Andy
I have a two Rover 25's both on 04 plates. One is the iL and the other is the Impression S3. In the iL the drivers seat has lumber support and height adjustment but the Impression doesn't. Can I swap the seats around? and secondly is it easy to swap the seat covers. Impression S is Black and the iL is sandstone
ReplyDeleteGood guide, well done Andy !
ReplyDeleteExactly what I need to know. Thanks.
ReplyDeletePost a Comment
Let me know what you think by leaving a comment below.